This is a series of tutorials on How to use Facebook SDK for Windows Phone.
When i started using Facebook SDK I couldn’t find enough documentation for the functionality and usage of the SDK, It took me alot of time to figure them out.
I hope these tutorials will be helpful , If you have any Questions don’t hesitate to ask.
Facebook provides official SDKs for iOS, Android, JavaScript and PHP but for Windows Phone it is not an official one.
Before you get started, you need to register a Facebook Application by visiting the Facebook developer portal and obtaining an application ID. For more information, see for example, Register and Configure a Facebook Application.
How to make the Login Page and log in facebook
There is many different way to implement the facebook Login in windows phone , I chose an old one as you can use this tutorial with any version of the Windows Phone SDK.
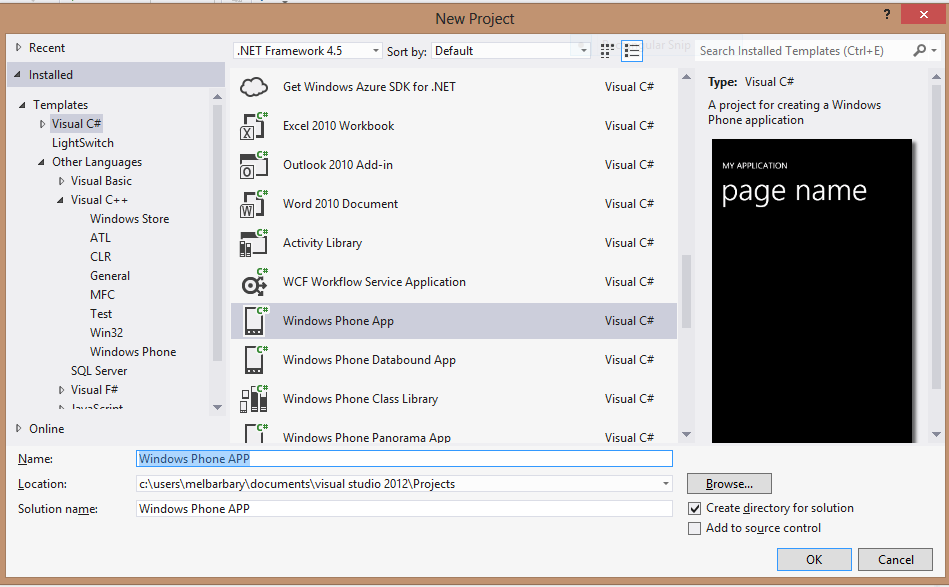
After Installing the Windows Phone SDK. 1- In Visual Studio 2012 Create a new project –> Visual C# –> Windows Phone APP lets call it Windows Phone APP
 Select Windows Phone OS 8.0 as the target operating system version. 3- Add the Facebook Client Library to your new project. Open the Package Manager Console from Tools –> Library Package Manager –> Manage NuGet Packages for solutions.. Search for Facebook as shown in the figure then press install
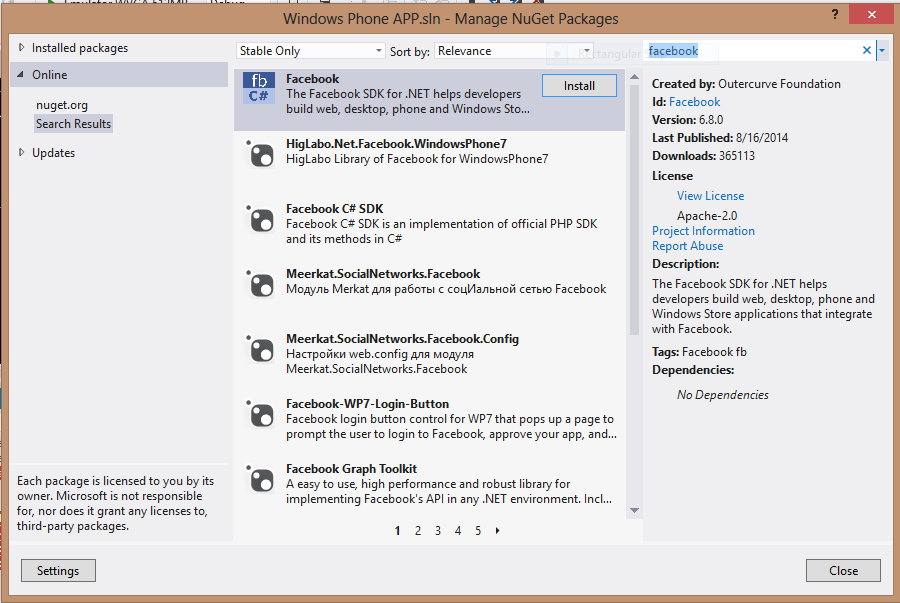
Note If you don’t have the NuGet Library Installed It should be installed from here : http://docs.nuget.org/docs/start-here/installing-nuget
otherwise , The Facebook SDK should be installed successful then press ok .
4- By the same way install Facebook Client as in the example 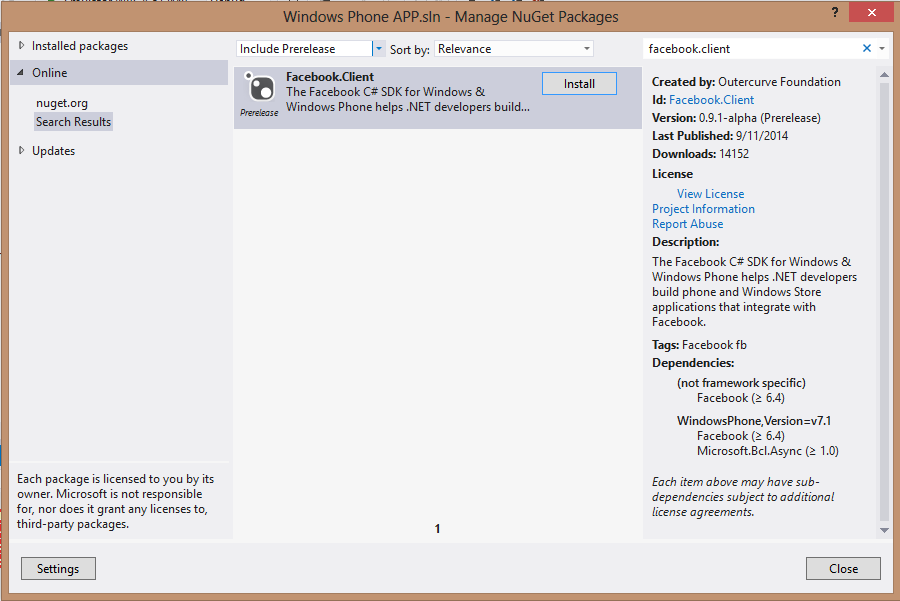
5-Open MainPage.xaml in your project and switch to its XAML view. In the title Panel in the xaml code Change the Title as in the example bellow
<!--TitlePanel contains the name of the application and page title-->
   <StackPanel x:Name="TitlePanel" Grid.Row="0" Margin="12,17,0,28">
            <TextBlock x:Name="ApplicationTitle" Text="FACEBOOK Integration" Style="{StaticResource PhoneTextNormalStyle}"/>
        </StackPanel>
6- now we will add the login button , add the following lines of code in the Xaml code at the end of the page directly before the end of the layout grid'(</Grid>)
<!-- login control -->
  <Grid x:Name="ContentPanel" Grid.Row="1" Margin="12,0,12,0">
            <Button Content="Login To Facebook" Height="73" HorizontalAlignment="Left" Margin="101,252,0,0" x:Name="btnFacebookLogin" VerticalAlignment="Top" Width="276" Click="btnFacebookLogin_Click" >
            </Button>
        </Grid>
you will notice that the button is added in the design at the middle of the page.
Facebook Authentication on Windows Phone works using OAuth. The Facebook.Client library comes built in with the FacebookSessionClient construct which automatically displays a WebBrowser for the Facebook login. Whenever we make a login call from within a page, we will first see the UI in the page which made the login call and then we will navigate to the Login page and then back to the original page or the page we want to navigate to.
7- Now we will add the code behind this button but first we need to create the page that will host the WebBrowser control for OAuth.
To do so, right click on the Project that we previously named it (Windows Phone APP)and select Add New Item. Select Visual C# on the left in the Add Dialog and then select Windows Phone Portrait Page in the middle pane and name it FacebookLogin.xaml. We need the FacebookLogin page to be a blank page so we will remove parts of the auto generated code from FacebookLogin.xaml.
Remove this block of code, Now the page will be blank
<!--TitlePanel contains the name of the application and page title-->
<StackPanel Grid.Row="0" Margin="12,17,0,28">
<TextBlock Text="MY APPLICATION" Style="{StaticResource PhoneTextNormalStyle}"/>
<TextBlock Text="page name" Margin="9,-7,0,0" Style="{StaticResource PhoneTextTitle1Style}"/>
</StackPanel>
Back to Our MainPage.Xaml.cs lets add the button click implementation , This lines of code will navigate the MainPage to the page we just create it , The one that will host the facebook login page.
private void btnFacebookLogin_Click(object sender, RoutedEventArgs e)
{
    NavigationService.Navigate(new Uri("/Pages/FacebookLogin.xaml", UriKind.Relative));
}
Once the user has navigated, to the OAuth page, we want to connect the event handlers so that the FacebookLogin will load the OAuth dialog using FacebookSessionClient.
8- First add the following line to the FacebookLogin constructor, which invokes the Facebook login as soon as we navigate to the FacebookLogin: In FacebookLogin.xaml.cs in the constructor after InitializeComponent(); add this line
this.Loaded += FacebookLoginPage_Loaded;
Then add the following code snippet to FacebookLogin.xamls.cs, which checks if the user is already authenticated and if not, invokes the Authentication.
async void FacebookLoginPage_Loaded(object sender, RoutedEventArgs e)
{
    if (!App.isAuthenticated)
    {
        App.isAuthenticated = true;
        await Authenticate();
    }
}
As the final step of Autentication add the following code to perform the Authentication and request read permissions for the user’s profile and other data when the login succeeded. But first we need to create a new page the same as we did before lets call it LandingPage.Xaml we will navigate to this new page directly after login.
private FacebookSession session;
private async Task Authenticate()
{
    string message = String.Empty;
    try
    {
        session = await App.FacebookSessionClient.LoginAsync("user_about_me,read_stream");
        App.AccessToken = session.AccessToken;
        App.FacebookId = session.FacebookId;

        Dispatcher.BeginInvoke(() => NavigationService.Navigate(new Uri("/LandingPage.xaml", UriKind.Relative)));
    }
    catch (InvalidOperationException e)
    {
        message = "Login failed! Exception details: " + e.Message;
        MessageBox.Show(message);
    }
}
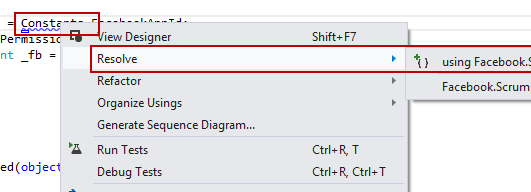
You will find alot of errors and red lines in the code , Don’t Panic 😀
on every error rightClick on it –> resolve –> choose Facebook.client for example as shown bellow
In App.xaml.cs add the Facebook App ID here with your Facebook App ID that you obtained earlier when you created your app on the Facebook Developer Portal and add the following four variables to hold the Facebook OAuth Access Token, the User’s ID once they have logged in into Facebook, a flag to keep track that the user has already been authenticated and the FacebookSessionClient class which wraps the Facebook OAuth login. at the begining of the class right before the constructor
public static readonly string FacebookAppId = "ADD YOUR APP ID";
internal static string AccessToken = String.Empty;
internal static string FacebookId = String.Empty;
public static bool isAuthenticated = false;
public static FacebookSessionClient FacebookSessionClient = new FacebookSessionClient(FacebookAppId);
Now the facebook should login Successfully after resolving any missing dependency .
One more things recently there is a bug in the facebook SDK where when you run the application and click on the login button you will see this instead of the login page
Given URL is not allowed by the Application configuration.: One or more of the given URLs is not allowed by the App's settings. It must match the Website URL or Canvas URL, or the domain must be a subdomain of one of the App's domains.
The solution for this issue is to do as bellowThere is currently a bug which will prevent Facebook Login for Windows Phone from working if you have any entries in the “Valid OAuth redirect URIs” field in the Advanced section of your app settings. This can be worked around by adding “https://m.facebook.com/dialog/return/ms” in this field.
Try different links this one worked for me

This is my first tutorial, if you have any suggestions for improvement in the next tutorials please write it in the comments.

But what platform should we select for Windows Phone ?
you mean development platform ?
0 Pingbacks